
If you have not touched the previous post, I explained what deployment options are available with vRealize Automation and what components have to be installed. So you can give it a look.
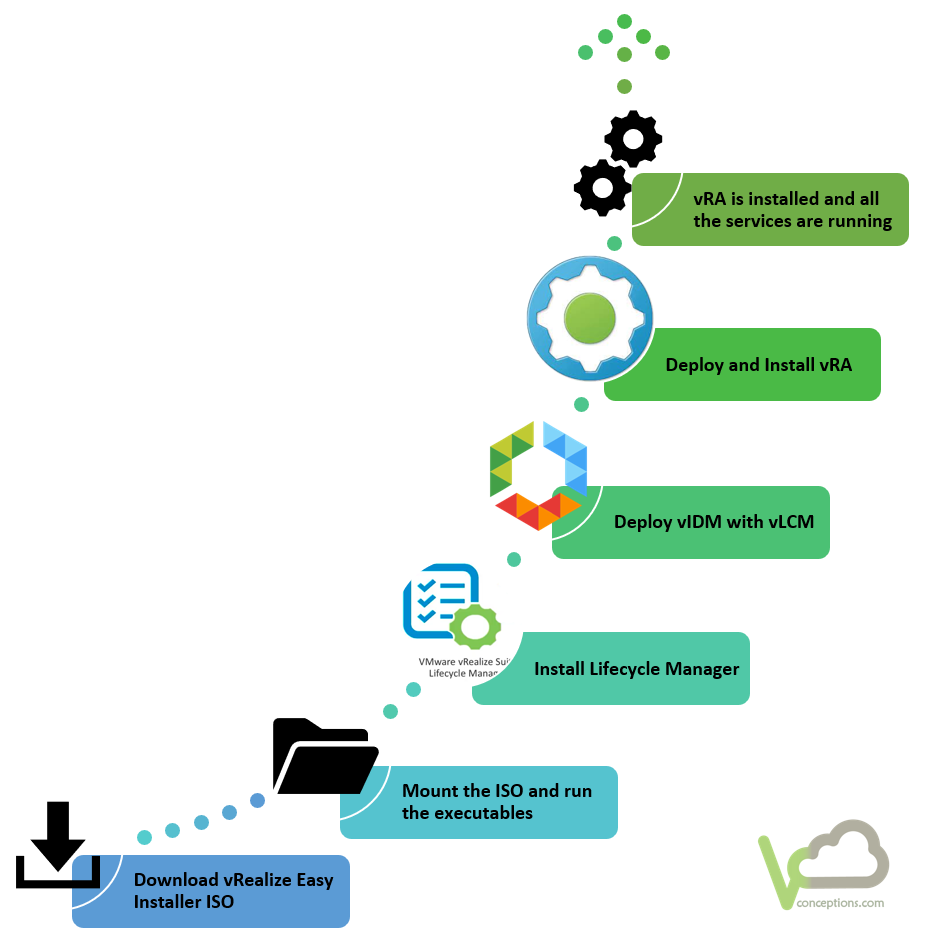
vRA Installation Steps
It’s a series of steps that have to be taken when it comes to an installation task, and vRA is of no exception.
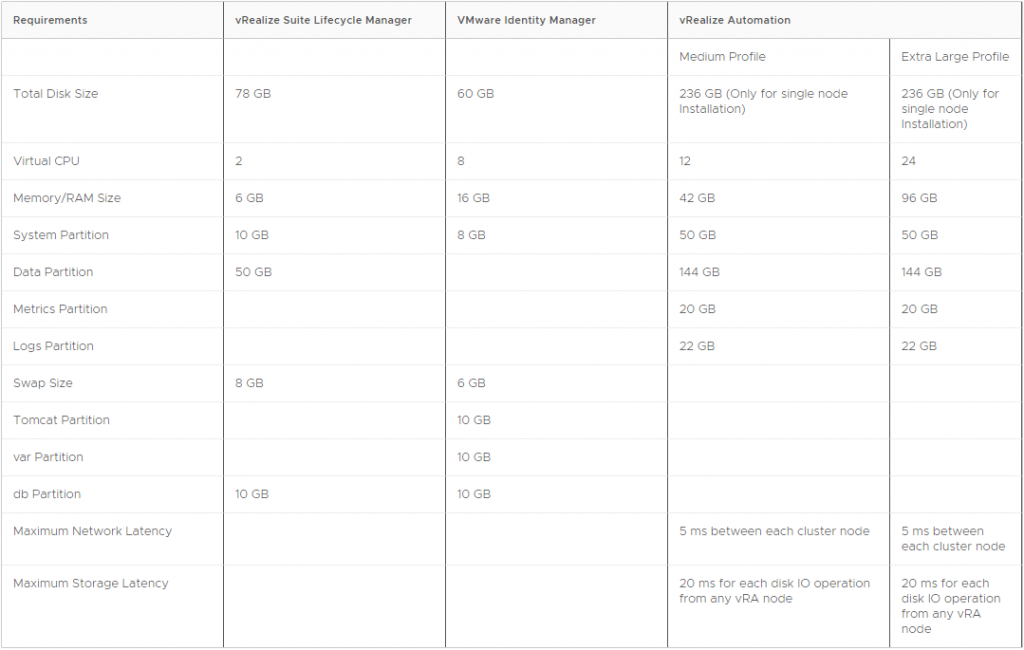
vRA System Requirements
The picture above illustrates the whole installation process, but before we jump into installation, let’s see what are the system requirements for each component.
Installation
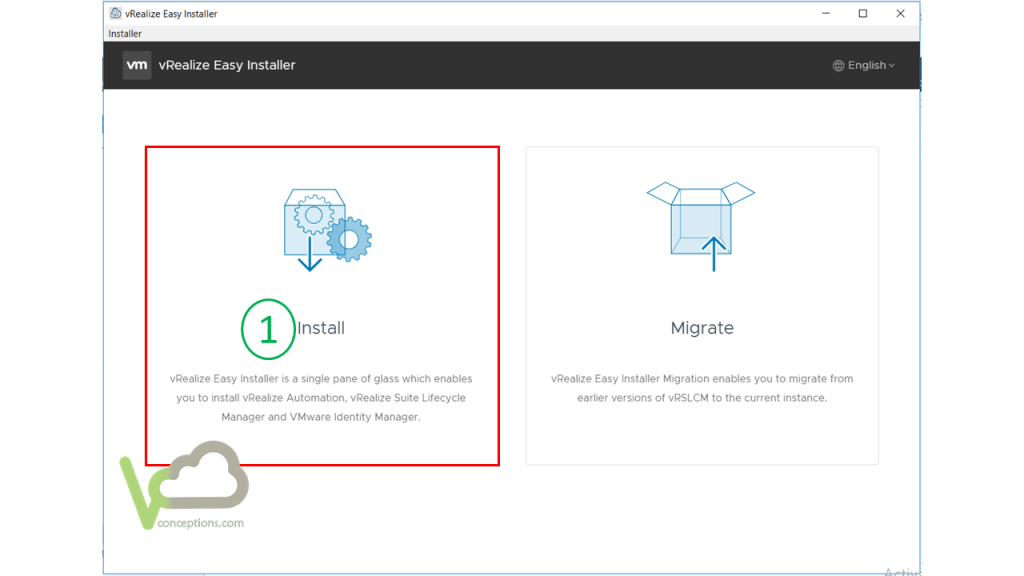
The very first step as mentioned before, is clearly mounting the installation media and running the UI installer located at [driver_letter]:\vrlcm-ui-installer\win32\installer.exe.
Run the executable file and click Install.
Click Next, to start the installation process.
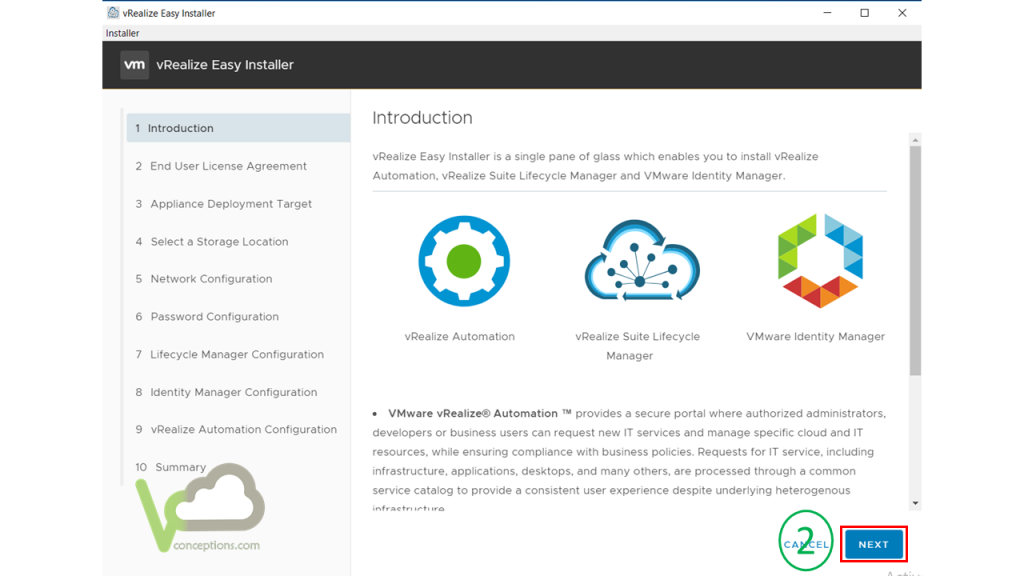
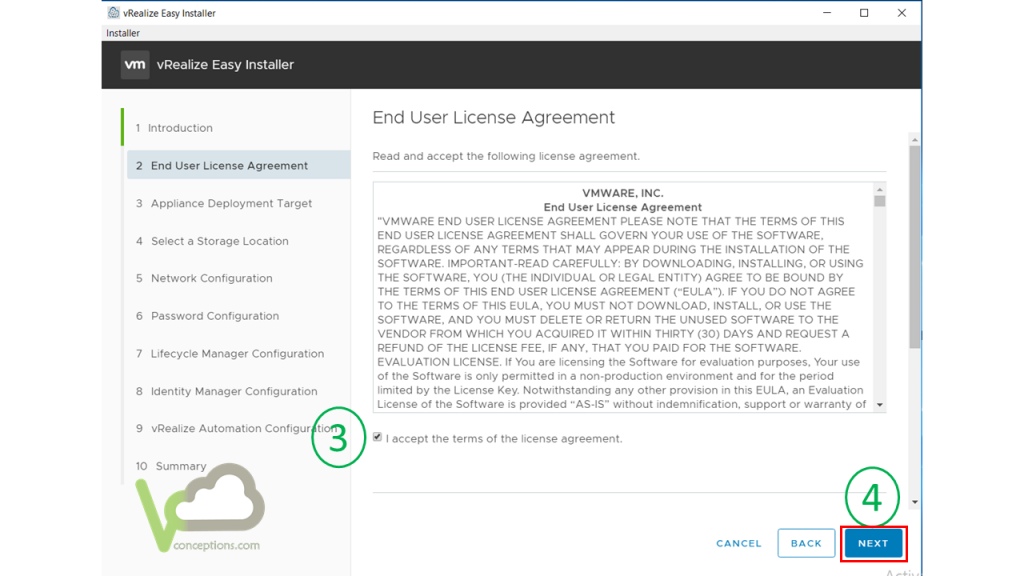
Accept the End User License Agreement and Click Next.
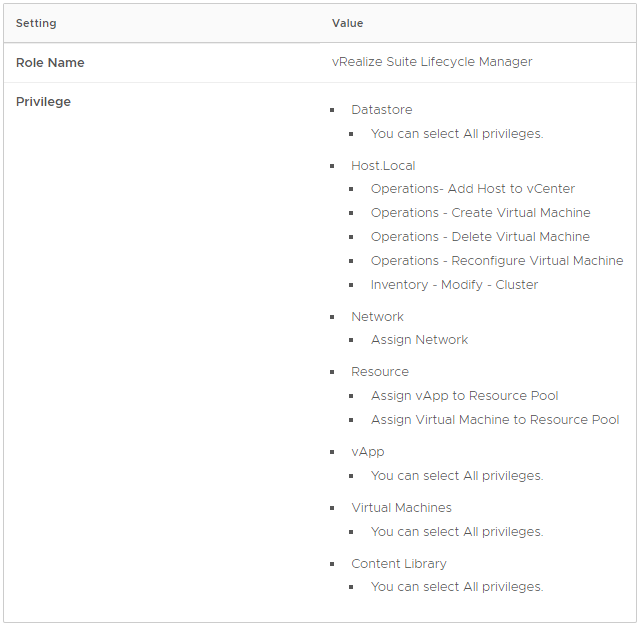
In the next step, you will be asked the target vCenter server that vRA will be deployed on, for that, I will create a role with the name of vRealize Lifecycle Manager with the required permissions as depicted below.
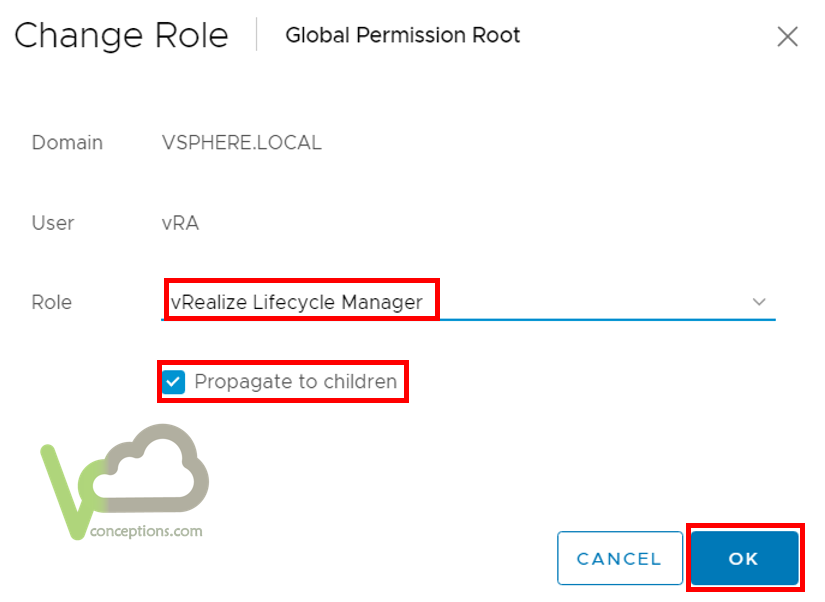
Now, assign the role to an already created user, here is vRA@vSphere.local in global permissions as depicted below.
Once the user creation and role assignment is done, enter the vCenter server address and the required credentials and hit next.
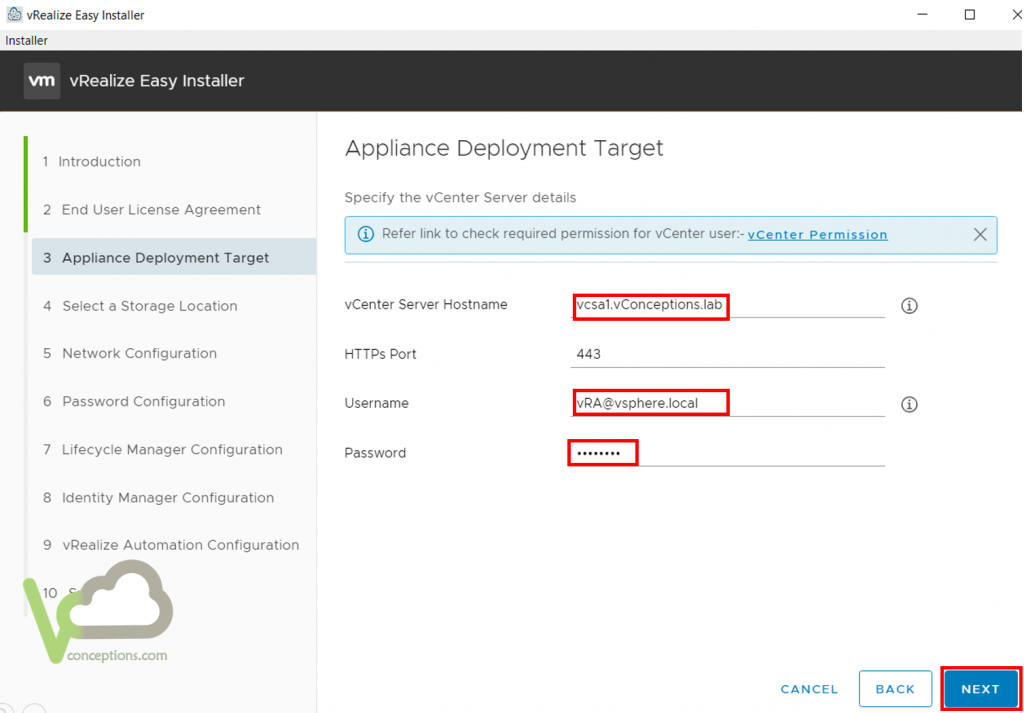
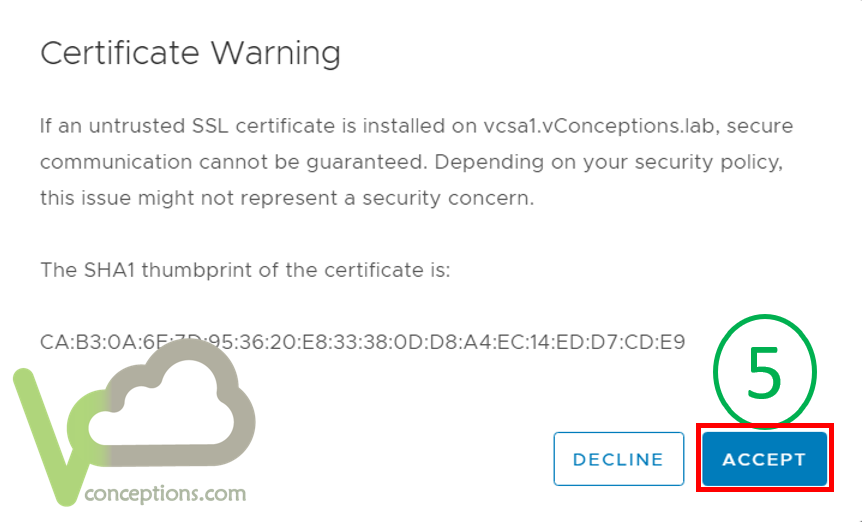
As here we are using a self-signed certificate, accept the warning and go ahead.
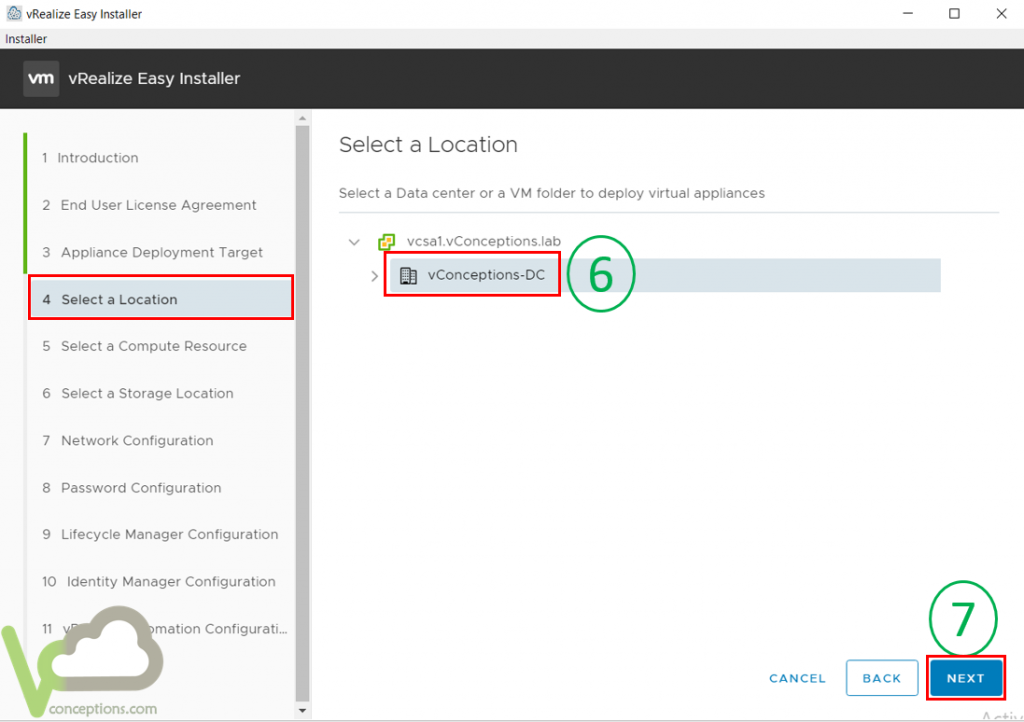
select the location where the deployed machines will be placed on.
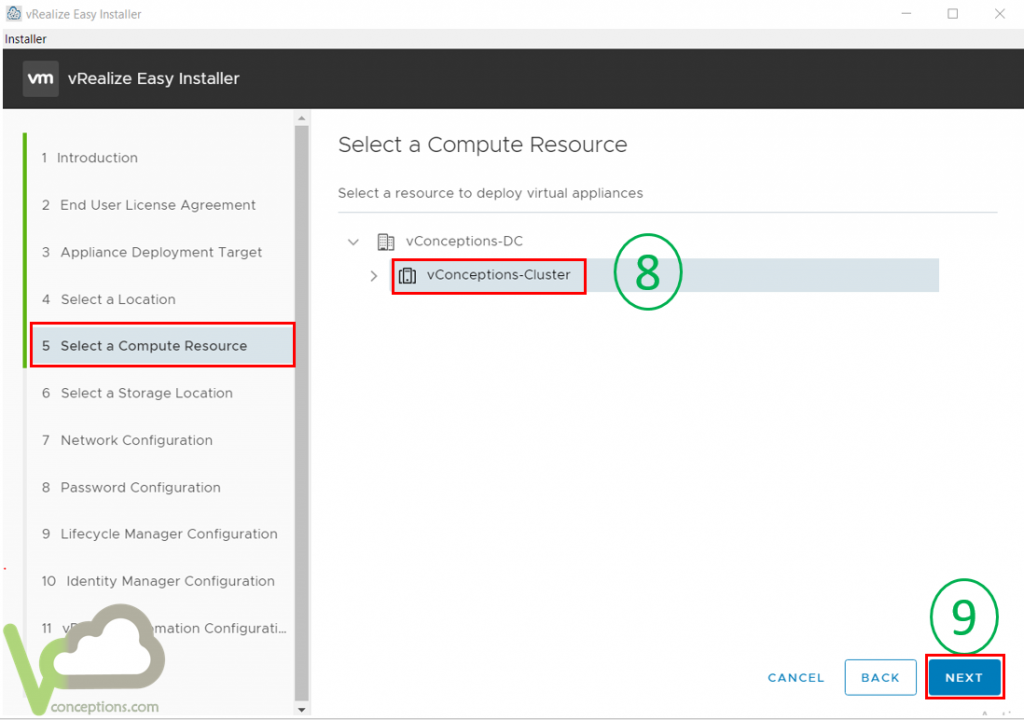
Select the compute resource, here is the cluster, make sure DRS is turned on, because the installer will attempt to power on the virtual machines automatically. click next.
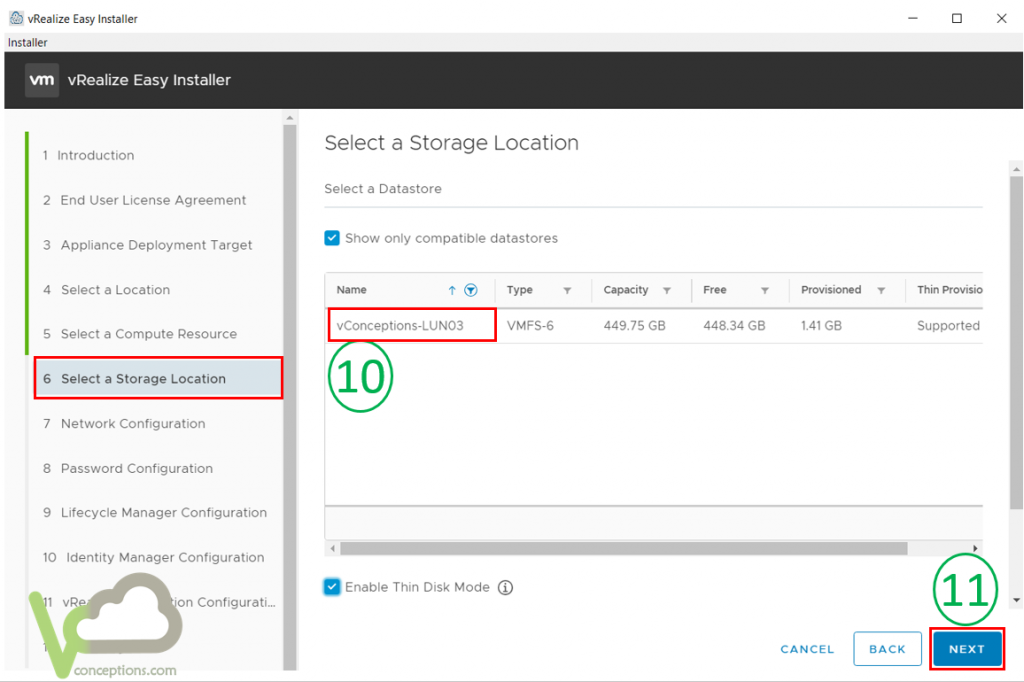
select the datastore where the virtual machines will be placed on. make sure you have the required free space as already been mentioned. Then click next.
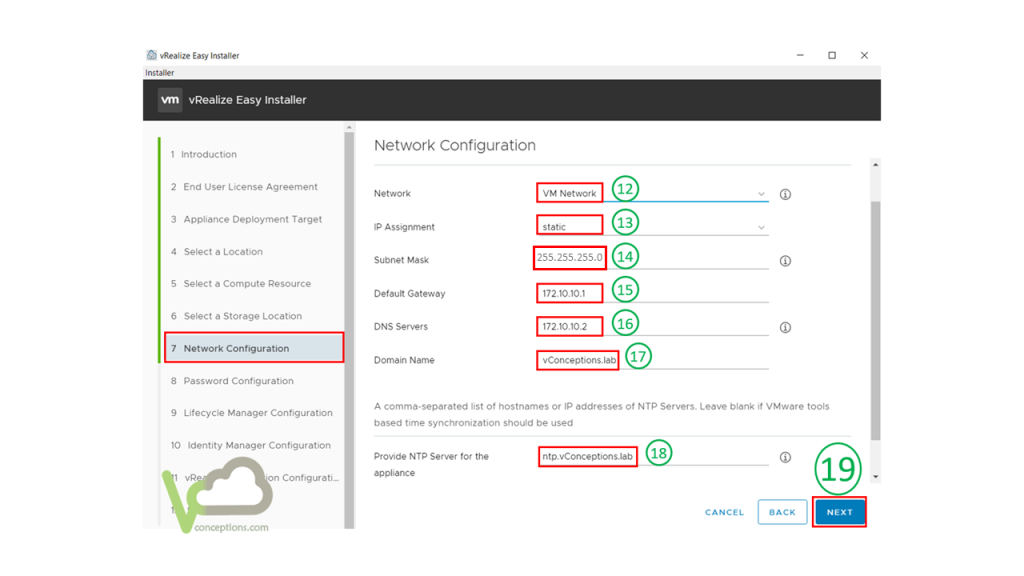
select the portgroup and provide other networking information as depicted below. FYI, NTP server importance here is a must as the vRA deployment is highly dependent on time synchronization and you might face some errors in case your NTP server is not functioning properly. go ahead and hit next.
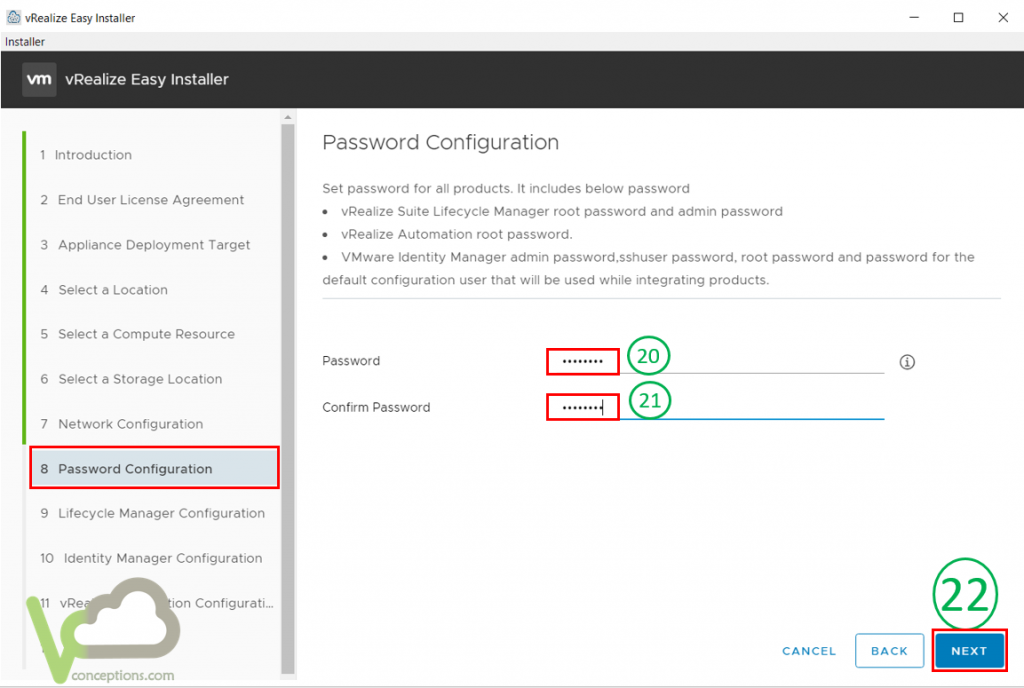
You need to provide a password, the password here is used for the following user accounts:
- vLCM root and admin password.
- vRA root password.
- vIDM admin, sshuser, and root password.
hit next.
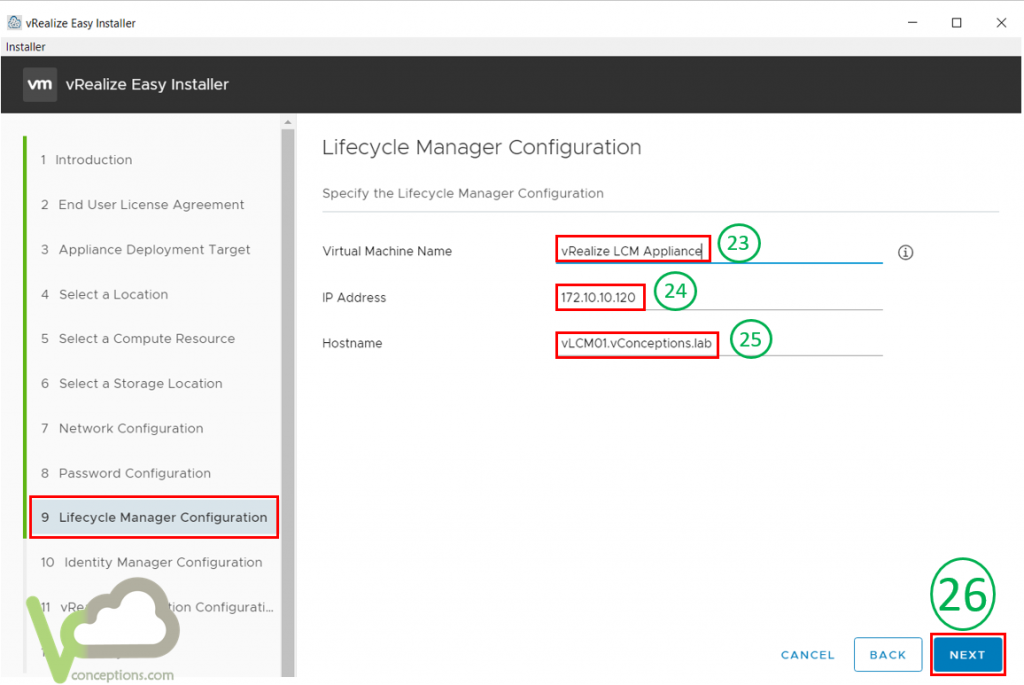
Enter the vRealize Lifecycle Manager machine name as well as IP address and the hostname. I already have created A,PTR records in DNS.
provide the same set of information for vIDM, here you can install a new deployment or import an existing deployment.
you have to enter a username for the default configuration admin which must be different from default system accounts (admin, root, sshuser), the password for this account is the one provided earlier in the deployment. click the next button.

for the purpose of this post, we’ll get into Standard Deployment, if you are not familiar with the deployment options available, see my post here. Provide the license key, VM name, IP address, and the hostname. Again the A, PTR records have already been created on DNS. go ahead and touch the next button.

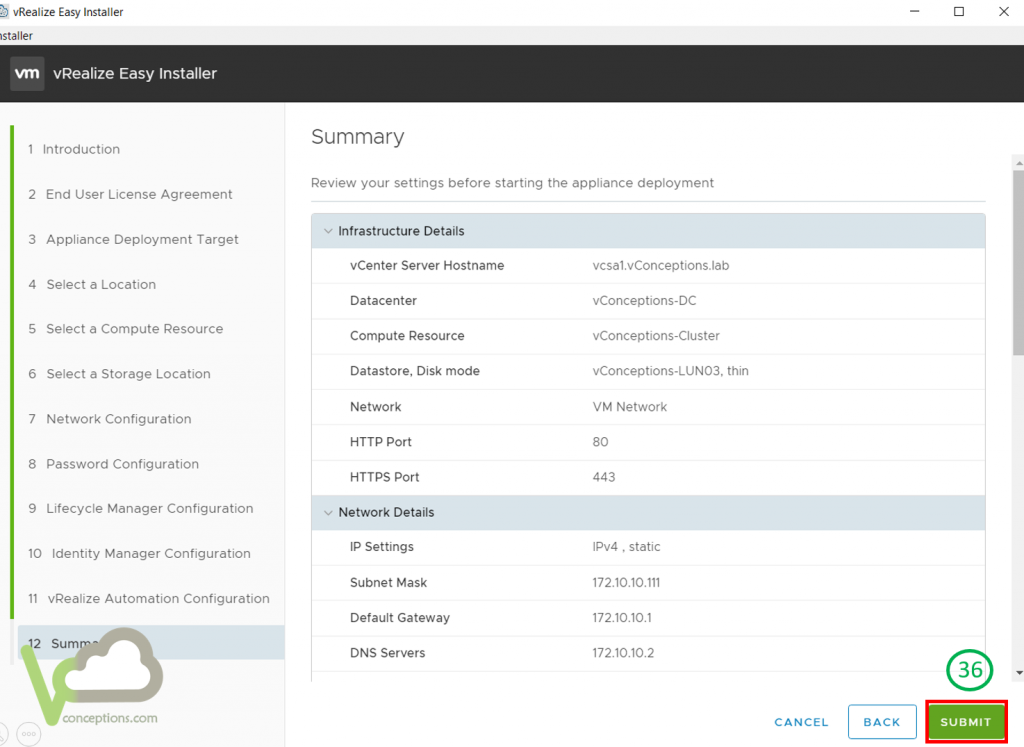
a lot of next so far, huh? that’s the end, in summary page, review all the provided information and click the Submit button.
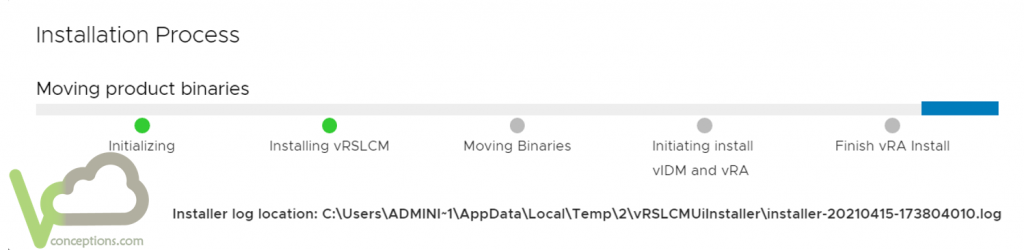
You can monitor the installation progress, and as you can see the very first component being deployed is the vLCM.
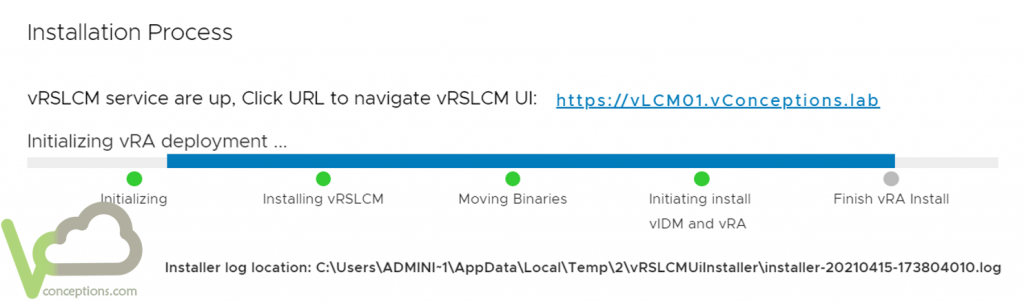
take a rest for several minutes then vLCM is deployed and will be used to deploy vIDM and vRA respectively, see the picture below. Form now on, you can review the installation process on the vLCM console as well.
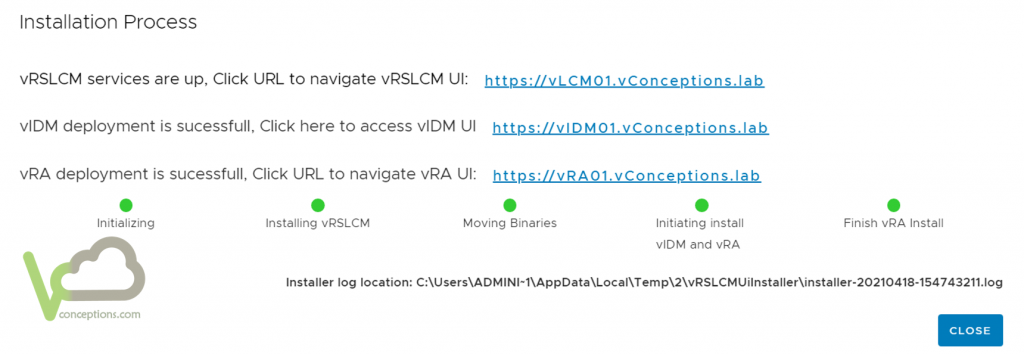
Once all the three components have been successfully installed, you will end up with the screen below. and yes you are done with the deployment of vRA with easy installer.
I hope this’s been informative for you, in the coming blogposts, we’ll get into more details.